Showing posts with label home decorating. Show all posts

Wednesday, July 17, 2013

For The Love Of Spray Paint

As you all may remember the predominate theme is our house decor is GOLD...not by choice of course.
This house is covered from head to toe in wallpaper, trim trim and more trim and of course GOLD.

We have started-up again in making this house a home.
 We are DE-GOLDING with the help of some good old spray paint...

Yep!!  It's cheap, it's quick and guess what... IT LOOKS GREAT!!

Our first go at it with a bottle of spray paint was a huge chandelier in our entry way....which was, you guess it... GOLD .

There was NO WAY that we would have been able to afford the cost of replacing such a massive light fixture so we went with option B, black flat spray paint. (my husband wanted to go with high gloss however I won that battle and we stuck with flat for a rod- iron finish)

The Before.  

We did not want to get involved with taking down the heavy chandelier and the electrical so we spray painted it in place (I'm sure this is not ideal).

We opened the front door for ventilation and sealed off all other doors in the house.
**Warning, if you are going to do this a fine DRY black (or whatever colour you are using) power gets EVERYWHERE.**
It's a huge mess however a quick and easy clean up.

Before spraying we cleaned the light, removed the "candle sticks" and little gold caps that topped the "candle sticks"

and began to spray, 4 cans later, 

The AFTER:


As you can see we still have to go back to finish spraying the rope and cap on the ceiling.  We need to protect the ceiling before spraying so close to it.


 I LOVE THE END RESULT!

Now onto the rest of the house...
Wednesday, October 17, 2012

A Wall mural

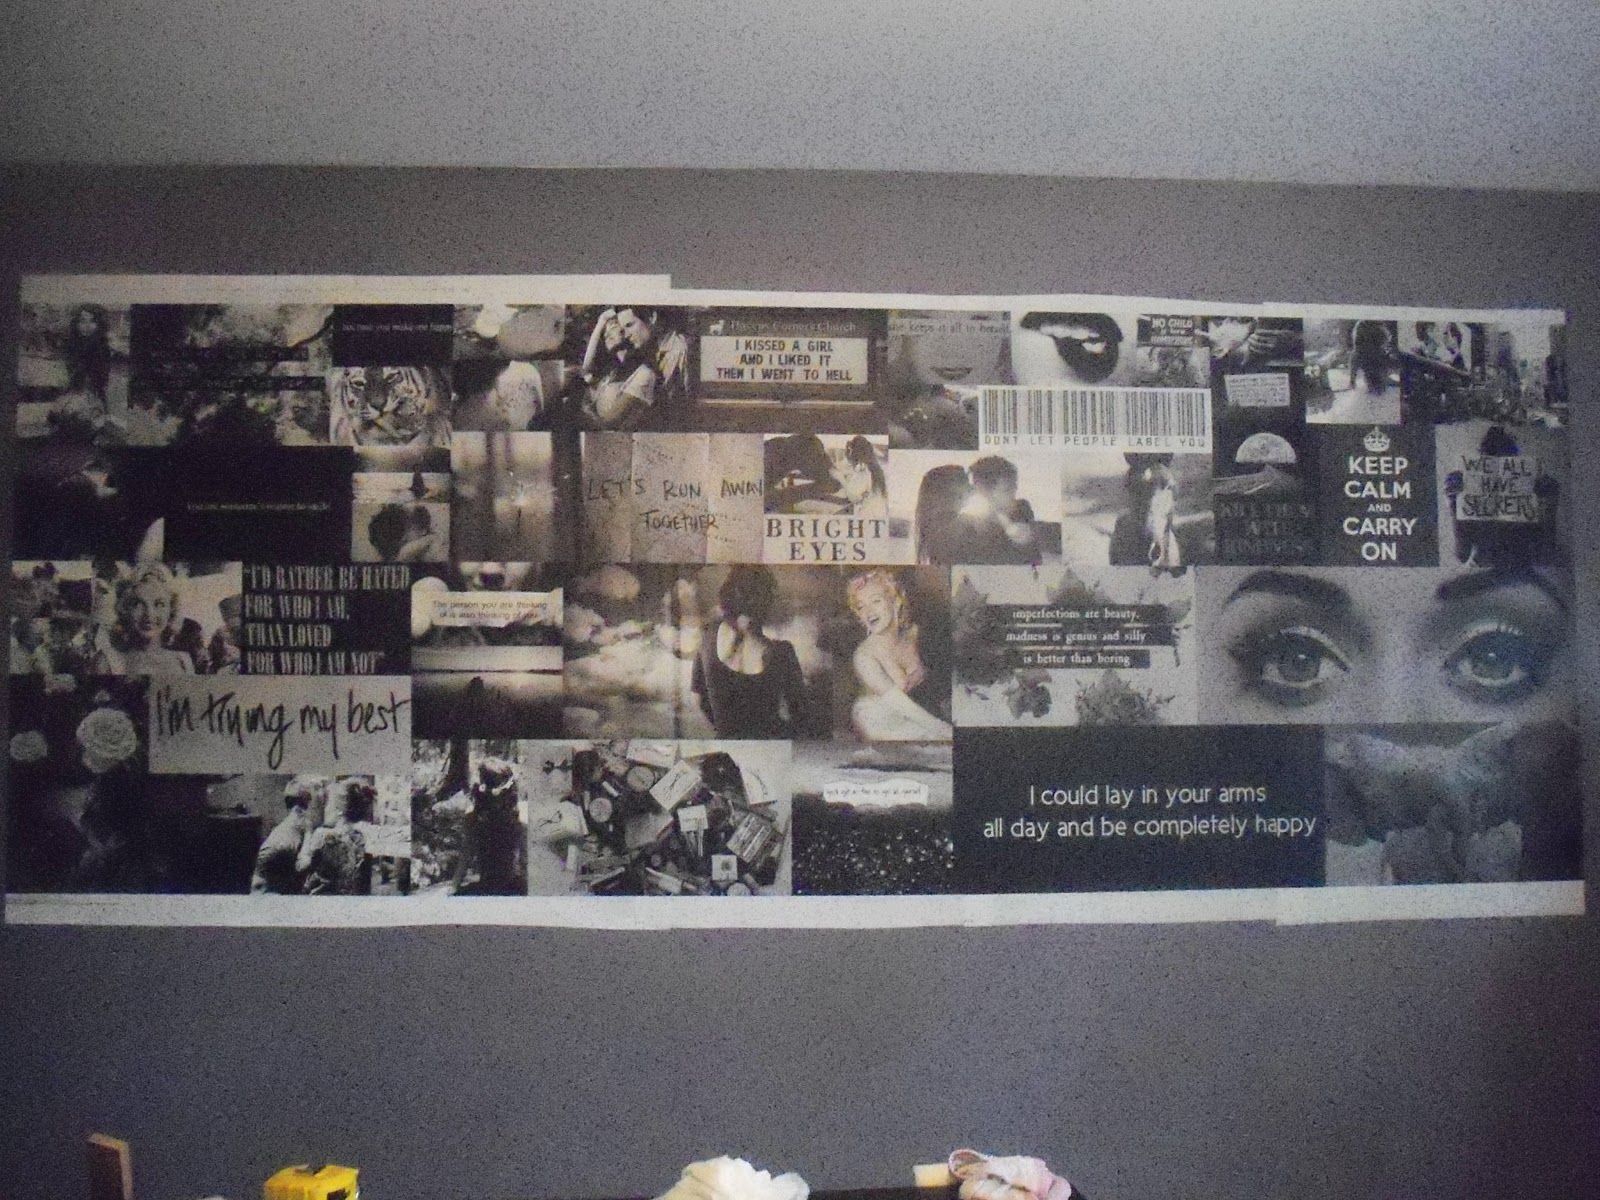
Here is the breakdown of Kailyn's wall mural that we hung in her room above her bed. Check out the post Purple and Concrete, a room transformation   to see the whole post and pictures.

We wanted to add something with texture, that made a statement and something that said THIS IS KAILYN'S ROOM.  I looked all around for different types of wall paper and just could not find anything that suited her.

One day I was watching Steven and Chris on CBC and they did a segment where their guest used InkShuffle to make custom wall paper for a room she had designed.  And the idea was born...I will surprise Kailyn with a wonderful wall mural of all the things she loves.

So I went to work, my husband not to keen on the idea that I was working on this all on my own, knowing full well that my 15 year old was NOT going to like ANYTHING that I added to this mural.  He talked me into showing her my finished product...and he was RIGHT!

She LOVED the idea HATED what I had done.

After I healed my broken heart, I finally came to terms with the fact that this was HER room and it was for her.  This mural was not going to be coming down for awhile so LETS make it just what she wants.

For the next two days Kailyn and I went through images that she and I liked.  I shredded the ones "not appropriate" and she nixed the ones "to babyish"

In the end we ended up with THIS:

  •  I first edited each photo to make them a cohesive black and white. I used Picmonkey to do so.
  • Then with the help of Picasa I was able to upload my images and use their collage feature which arranged the images for the size and shape that I needed.
  • Once that was done I uploaded my saved image that I had made from Picasa to InkShuffle input the size I needed to make my mural. The only problem was the total came to over $300.  Sorry Kay, that is NOT going to happen.  The mural that once was made to go behind the full wall (length and width) behind her bed got shrunken down to a more manageable size, money wise on her wall behind her bed.  
After I painted we had to measure out to find center. 

 Next step was to follow the instructions.  InkShuffle makes it very easy to install your wallpaper.  All sheets are numbered (I believe we had 5 sheets to put up) as well as where to overlap your sheets to make one seamless piece of art.  You wet it for 15 sec just like your usually wall paper and apply it to the wall and smooth out all air bubbles.
 

Finished and ready for the border.  Since we had to make our image smaller then the wall due to the cost we decided to frame our mural/art work with a homemade frame.

 We took door/window casing spray painted it a glossy black...
 and done!

As much as I would have liked to have been able to mural the whole wall I like what we had come up with.

Monday, October 15, 2012

The Dresser...Before and After

Kailyn was in need of some major dresser help. 
Her dresser from years ago that we purchased at Ikea was falling apart.
I mean, it was embarrassingly falling apart!
It only had 3 drawers in the first place.  
Not nearly the space that she needed.
1 of the 3 drawers were no longer able to even fit into the fame, it was so broken.
Kailyn kept that drawer on her floor with clothes flowing out everywhere.
It was a mess!!
 I knew I needed something with a lot of deep drawers,
I wanted to give her as much space as possible so she had NO excuse not to put her clothes away.
I went looking for a new dresser on kijiji and I found this (as seen below)
(I bought it as a set and I'm going to be using the long piece for the girls room


The before

brass handles had to go

I think the previous owners tried to give it an antiqued/it's been through a fire look??
I wanted something modern but that still had character and this dresser was perfect.  
The dresser has great details from the shape of the handles and the little key hole accent piece on the 3rd drawer, super cute, to the square detailing around the top and middle of the piece...some real nice details.  

First I took off all the handles and key accent piece.

I washed and sanded the dresser down, trying to get rid of any marks and old paint residue from the previous owners.  I started to paint it and about 3 coats in to it I was happy with the finish product.

We spray painted the handles and the key accent piece a glossy black and then sprayed on a clear coat hoping to protect them from any chipping.

I was torn between a silver or black finish.  I'm happy with the black.
and that was that, I was done and I was so happy with the look.


This blog post is part of Purple and Concrete a Bedroom Transformation. Click the link to read

Friday, August 24, 2012

Painting OUT OF THE BOX (or closet in this case)

We have been working on some really fun projects for Kailyn's room.

Of course it is not all cute rainbows, bright colours and butterflies when painting and decorating a very stubborn, very independent and mature 15 year old's bedroom.

Picking the paint colour was a little more difficult, but after much debate we found one we both could agree on.
  
Once I started painting I really liked the colour especially against the white trim in her room, so much so, I got a crazy idea.  I thought the more the merrier and I started to paint out her closet doors.

Directly across from her closet wall we have a mural and a very fun headboard, makeup table and side table made of concrete going in.  SOOO we wanted that wall to be the focus in the room.  We are also placing a tall dresser on the same wall of the closet and I just did not like the look, it was too broken up for my liking with the white doors on the closet.  

So I went for it...

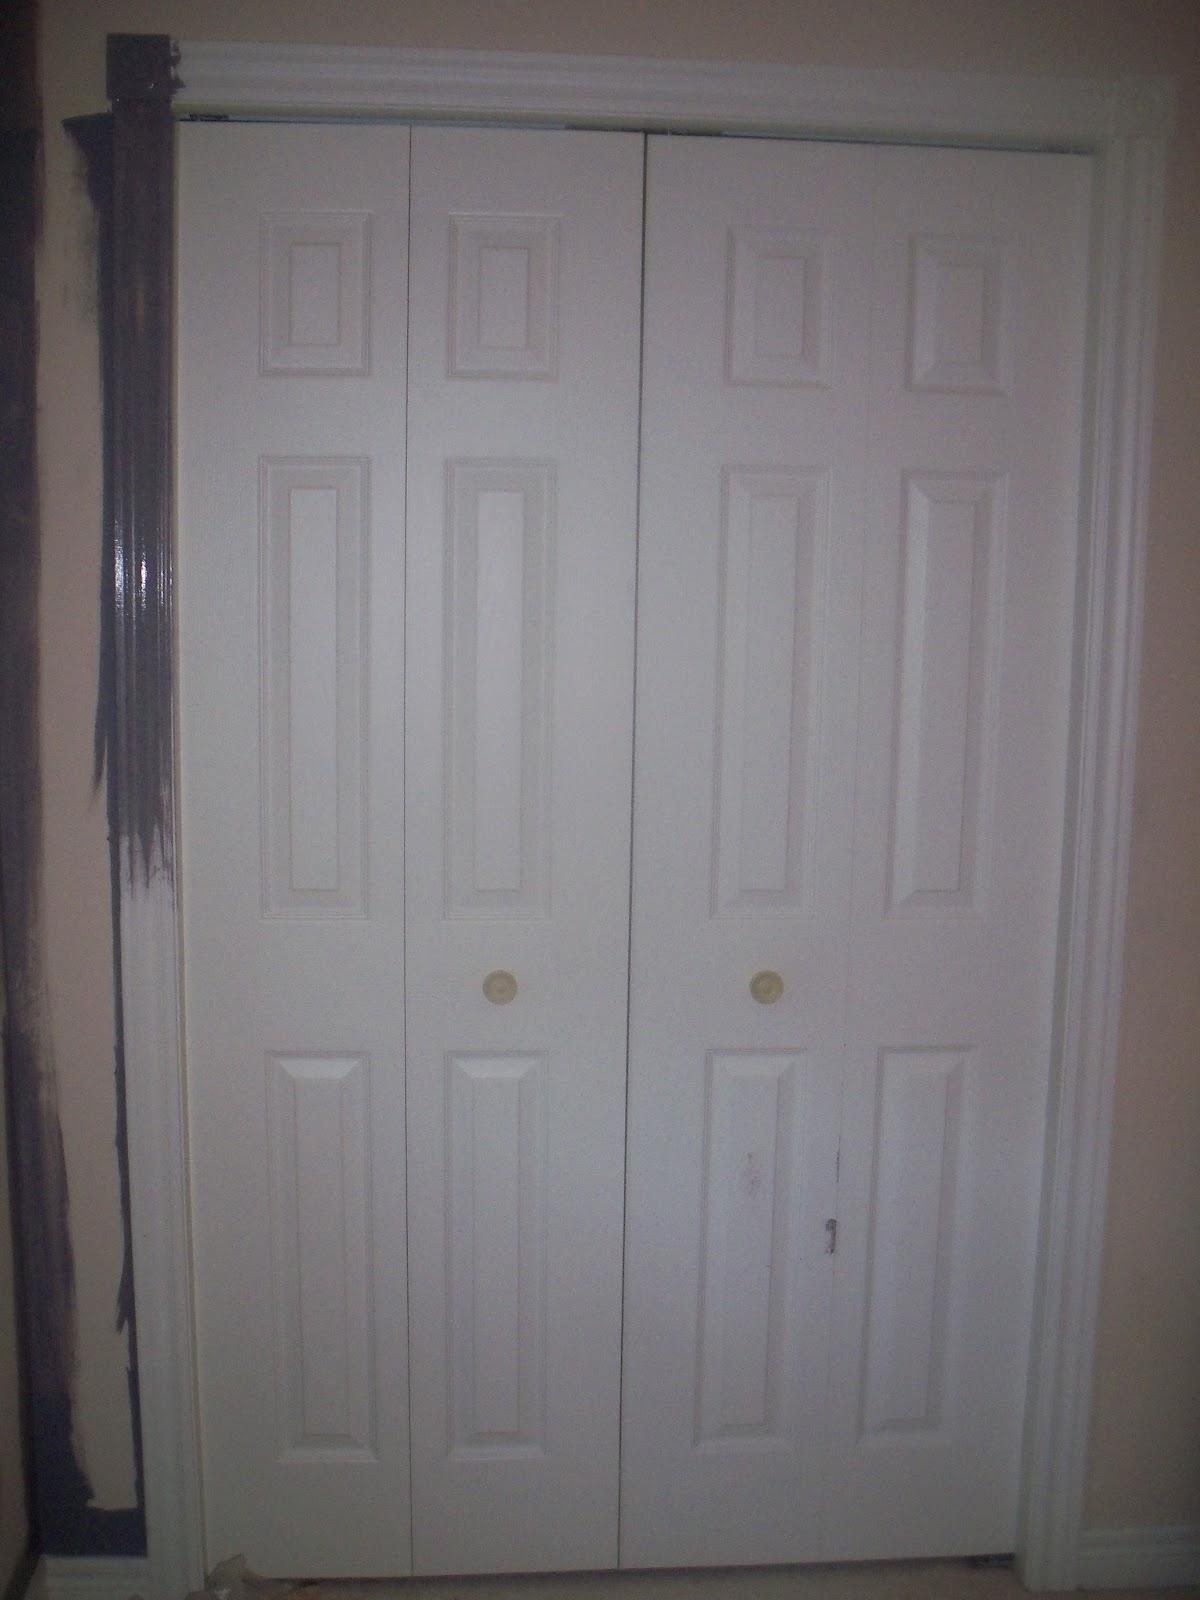
BEFORE: As you can see my before is a little after the fact but it was a millisecond thought and I just went with it.  I don't like to over think things most times.


STARTING: Truth be told, I was freaking out a bit at this point!  However the great thing about paint is that it is ONLY PAINT and you can repaint if needed.


Really freaking out at this point.


BUT, VERY HAPPY with the end result and most importantly Kailyn liked it too.

As you see I left her baseboards white.  I just painted the moldings around the closet and the doors.

TIPS TO PAINTING OUT A CLOSET:

Tip #1.
If you have carpet on the floor use a clear piece of packing tape. I first tried painters tape, it was too thin and flimsy and was not sticking good to the carpet.  A drop cloth will not do.  With the thick packing tape you are able to push down into the carpet and tape into the small space between the carpet and the molding.  This allows you to paint the molding right past the carpet without getting any paint on the carpet. 

 Perfectly done...no paint on the carpet.

Tip #2
When painting the closet doors don't forget the space in between the doors or at the end of the doors.  You don't want it to look unfinished when someone opens the door.

 Much better and finished!
Tip #3
I really like to paint doors with the small foam rollers for projects like this. I first trace out the squares with a paint brush and then finish painting with the foam roller.  They are easy to roll, they get into all the the groves and it is a little more fun...I think!

A couple of really cool door knobs and walla, a closet fit for a very stubborn, very independent and mature 15 year old's bedroom.    

I can't wait until this room is finished!!

Tuesday, July 31, 2012

Finding The Perfect Door Colour

Finding the perfect door colour could be a challenge.

I did not mind our old door colour, I thought that it was nice however my husband HATED IT!

He is colour blind, he can't see the "true" colours of red and green or any colours that have red or green in them and that had a huge impact on why he hated the front door.  To him every time he pulled up to the front of our house he was looking at a bright PINKish door...YUCK!

So I decided with our face-lift/make-over of the front yard the front door would get a fresh coat of paint, one that my husband could see and would LOVE.

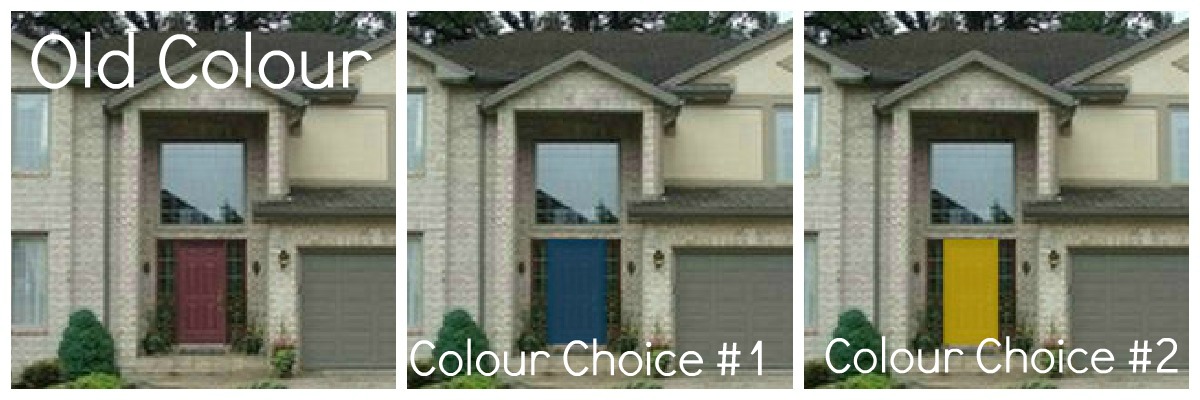
We were looking for a colour that would complement the brick and the already painted garage doors but that did not blend in. We wanted a fresh, contrasting colour to welcome our guests and of course a colour that my husband was able to see and enjoy just like the rest of us.

These are the choices I came up with:


Paint Colour SW6251 Outerspace Sherwin Williams


 Paint Colour SW6689 Overjoy Sherwin Williams


So how did I make the decision?

I went to PicMonkey of course!

I took a photo of the front of the house, downloaded it onto PicMonkey and then I clicked on the sticker editor.  I chose the rectangle shaped sticker, arranged and placed it over the front door.  I then changed the colour as best I could to match my choice colours (shown above) and I faded it just a little so the door details would come through.  I did this for each colour, saved them and made a collage with my saved pictures.

Here is my finished product:

 Using PicMonkey really helped me see what the colour would actual look like when I fished painting.

and I have made my choice...
Related Posts Plugin for WordPress, Blogger...