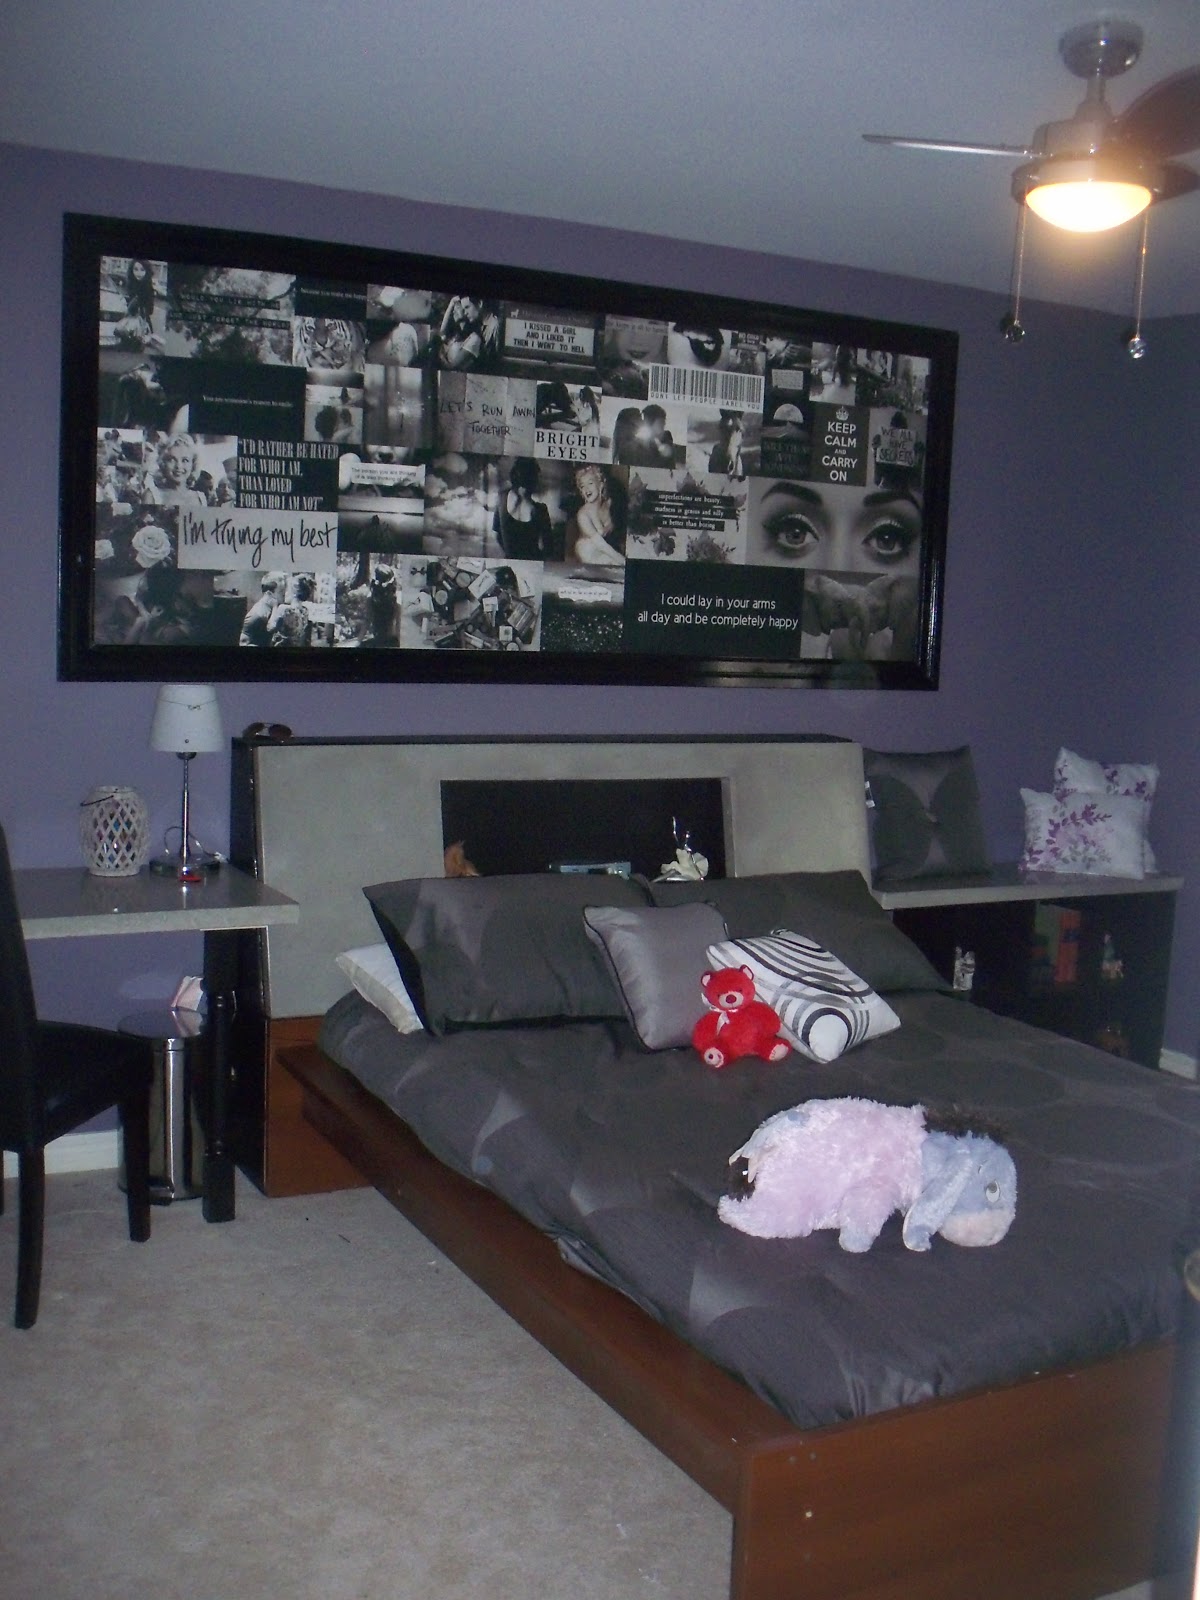
The concrete bedroom, well not 100% concrete but headboard...concrete, storage bench top...concrete and makeup/desk top...concrete, did not start out to be that way.
Kay's room
Purple and Concrete, a bedroom transformation
The concrete desk and storage bench started off basically with the same design and construction. It is basically a concrete slab. So we measured out out area and I molded their forms for the concrete to be poured.
Next I had to find some legs for the desk and a storage unit for the bench.
The legs were easy to find, unfinished table legs or stair railings you can find in any hardware store. We cut them to size, spray painted them black and done. The storage bench was not so easy. We had to find something to fit an already fixed size and shape. We had the concrete top made for it, we had the location for it, but we just could not find anything to fit the area the way we needed to. We were very close to making our own, until we took a look at Walmart. We found a great little storage unit that was the perfect measurements we needed...and when I say perfect I mean not even a cm off. So, yes, there was a little concern there!
 |
| make table/desk form |
 |
| storage bench form |
 |
| Forms filled with concrete |
The desk is supported by two things. First it is held up by the 2 front legs that we cut down to size and spray painted black, same as the mural border and screwed into the floor to make sure no one is able to knock down/out the legs causing the desk to fall. Secondly, it is also supported by a 2x4 sill running the length of the wall. We drilled into the wall studs and glued down the concrete top.
The storage bench, like I said, fit perfectly and it took a lot of work and force to make this happen.
 |
| The box |
 |
| The pieces |
|
|
We first had to put the pieces together to build this shelf that we picked up at Wal-Mart. We turned it on it's side to make a bench that fit a little too perfectly into the space we measured for.
As you see, in the picture below we put a hole in the wall trying to force the bench into place. We also cut out the trim on the wall...in the end it fit!! and so did the concrete top.
 |
| See the hole in the wall on the right hand side...but it fits :) |
 |
| and btw the pillow are NOT hiding the holes. We did fix it. |