We wanted to add something with texture, that made a statement and something that said THIS IS KAILYN'S ROOM. I looked all around for different types of wall paper and just could not find anything that suited her.
One day I was watching Steven and Chris on CBC and they did a segment where their guest used InkShuffle to make custom wall paper for a room she had designed. And the idea was born...I will surprise Kailyn with a wonderful wall mural of all the things she loves.
So I went to work, my husband not to keen on the idea that I was working on this all on my own, knowing full well that my 15 year old was NOT going to like ANYTHING that I added to this mural. He talked me into showing her my finished product...and he was RIGHT!
She LOVED the idea HATED what I had done.
After I healed my broken heart, I finally came to terms with the fact that this was HER room and it was for her. This mural was not going to be coming down for awhile so LETS make it just what she wants.
For the next two days Kailyn and I went through images that she and I liked. I shredded the ones "not appropriate" and she nixed the ones "to babyish"
In the end we ended up with THIS:

- I first edited each photo to make them a cohesive black and white. I used Picmonkey to do so.
- Then with the help of Picasa I was able to upload my images and use their collage feature which arranged the images for the size and shape that I needed.
- Once that was done I uploaded my saved image that I had made from Picasa to InkShuffle input the size I needed to make my mural. The only problem was the total came to over $300. Sorry Kay, that is NOT going to happen. The mural that once was made to go behind the full wall (length and width) behind her bed got shrunken down to a more manageable size, money wise on her wall behind her bed.


Finished and ready for the border. Since we had to make our image smaller then the wall due to the cost we decided to frame our mural/art work with a homemade frame.
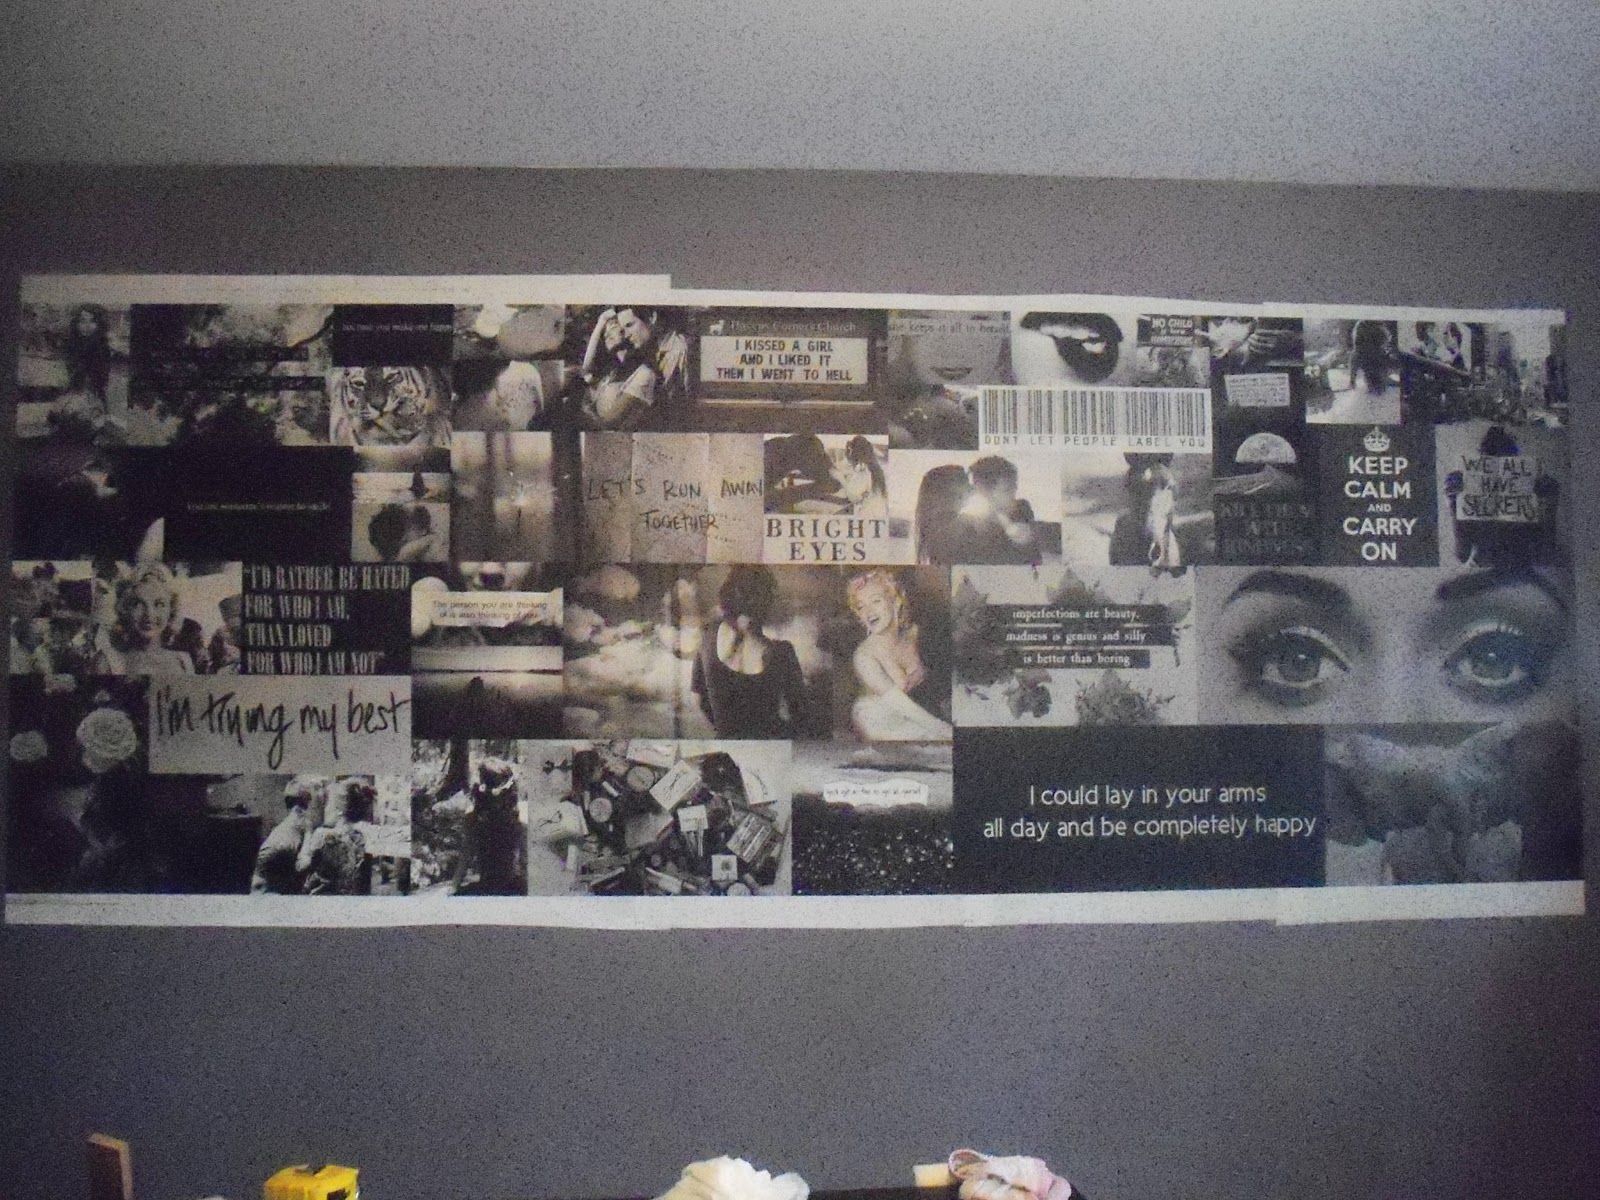


As much as I would have liked to have been able to mural the whole wall I like what we had come up with.
No comments:
Post a Comment
Thanks for the comment love